
You can integrate Backup Radar with N-able Cove Data Protection or N-Sight RMM. Follow the steps for the N-able product you use.
| Note: This article captures third-party steps and/or an interface that may have since been updated. |
Who can use this feature?
Backup Radar administrators.
What you’ll need
Access to the Backup Radar account where you want to configure the integration.
Access to your N-able Cove Data Protection account if you’re configuring Cove.
Your Cove top-level company and a unique API-user login name if you’re configuring Cove.
Your N-Sight RMM account details if you’re configuring N-Sight RMM.
Choose your N-able integration
In Backup Radar, navigate to Integration > Backup Integrations.
Choose the integration that matches your N-able product:
Cove Data Protection by N-able: Continue to Set up the Cove Data Protection integration.
N-Sight RMM: Continue to Set up the N-Sight RMM integration.
Set up the Cove Data Protection integration
Create an API user in Cove Data Protection
Create an API user in the Cove Data Protection management console before entering the credentials in Backup Radar.
For additional guidance, enter your email address on the N-able Cove authorization documentation page, then click the link to access Cove’s documentation about creating an API user.
In the Cove Data Protection management console, navigate to Management > Users.
Click API Users.
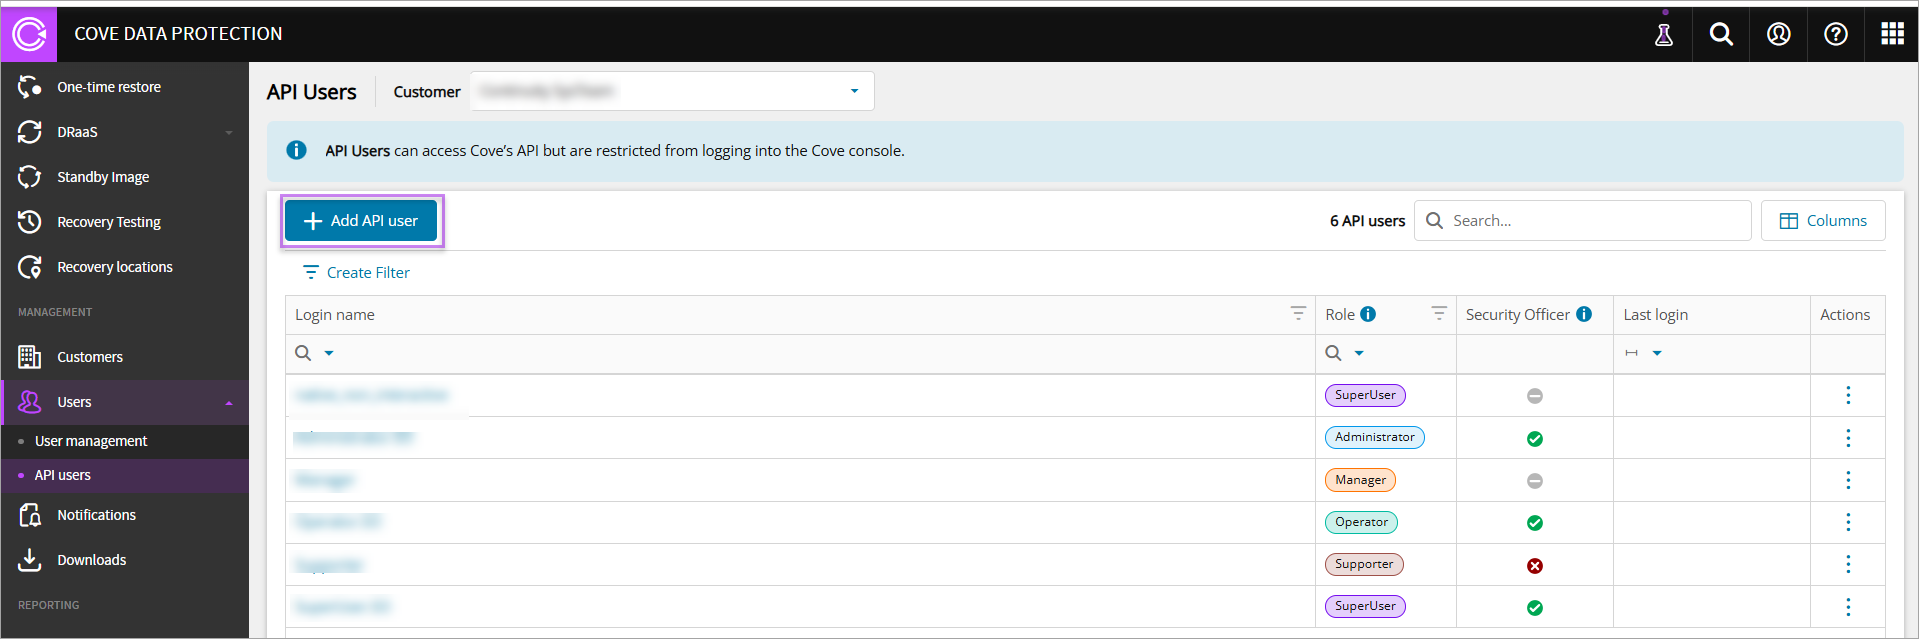
Click Add API User.
In Customer, select the top-level company. This is typically the MSP company.
-
Enter a login name.
The login name must be unique across all Enable Cove partners that use Backup Radar. We recommend using a name that identifies your company, such as
BackupRadar.msp. A generic name such asBackupRadarmight already be in use and won’t work. In Role, select Super User.
Under Additional settings, select Security Officer.
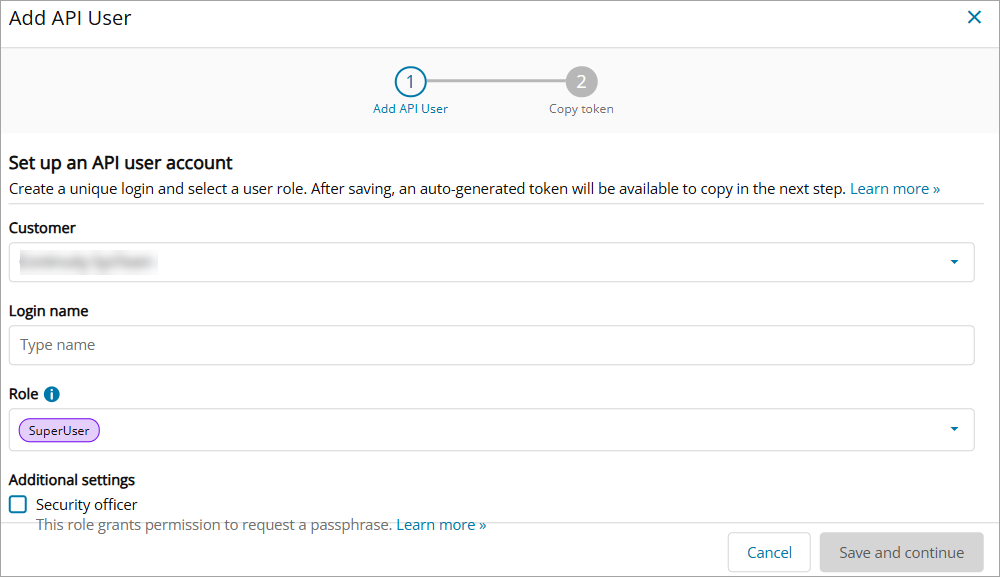
Click Save and continue. Cove Data Protection displays the API token, which is visible only once.
On the Copy token screen, click Copy token to clipboard.
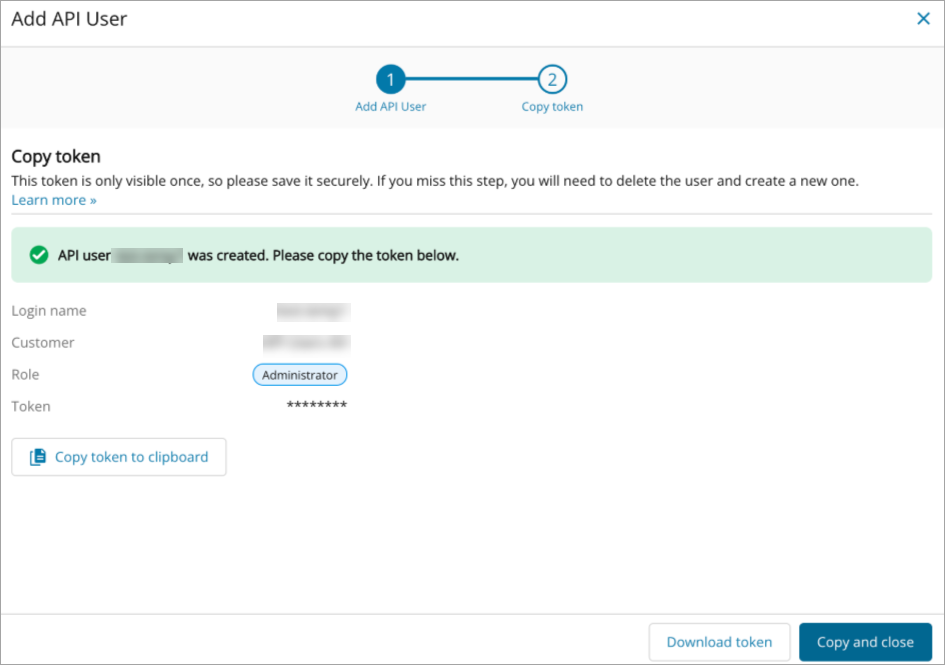
Store the token securely until you enter it in Backup Radar.
Important: If you don’t copy the token before leaving this screen, you’ll need to delete the API user and create a new one.
Enter the Cove credentials in Backup Radar
In Backup Radar, navigate to Integration > Backup Integrations > Cove Data Protection > Enable Integrations.
Enter a profile name in the Profile Name field. This is free text, so you can enter any name you want. We recommend using a name such as
CoveorN-able.Enter the Cove API-user login name in the Username field.
Enter the API token in the Password field.
Click Save.
Set up the N-Sight RMM integration
N-Sight RMM requires an API user to be created through N-able. Contact Backup Radar Support so we can provide the appropriate N-able contact.
In Backup Radar, navigate to Integration > Backup Integrations.
Open the N-Sight RMM integration.
Submit a support ticket to request the appropriate N-able contact for creating the API user.
Work with the N-able contact to create the API user.
Follow the instructions provided by Backup Radar Support to complete the integration.
Confirm the integration
Shortly after you save the integration, backup results begin syncing to Backup Radar. Once the results appear, map your clients to their backups so Backup Radar can assign each backup to the correct client.
For more details, see Mapping clients to their backups.
| ✉️ Any questions? Reach out to our friendly, neighborhood support team by submitting a support ticket. |
| 🎙️ Interested in attending a live Q&A session with our Product Adoption team? Sign up to attend Backup Radar Office Hours and get real-time answers to your questions. |
Related to

